
Requirements

You need Joomla 3.x and php 5.3.1 +

Here are Joomla's requirements.

If your site is not in English, You need a language pack for MyMuse in your language. If we do not have one contact us and we will start a translation.


If you are selling tracks, you will want the tracks themselves and a 'preview' version, often the first 30 seconds.

The tracks can be MP3 or WAV or FLAC or whatever you want.  You can sell multiple formats at different prices.
The previews are normally MP3's.

  • Hits: 5835

What Do I Do First?

1) Go to Components->MyMuse->Store
and edit the settings there.
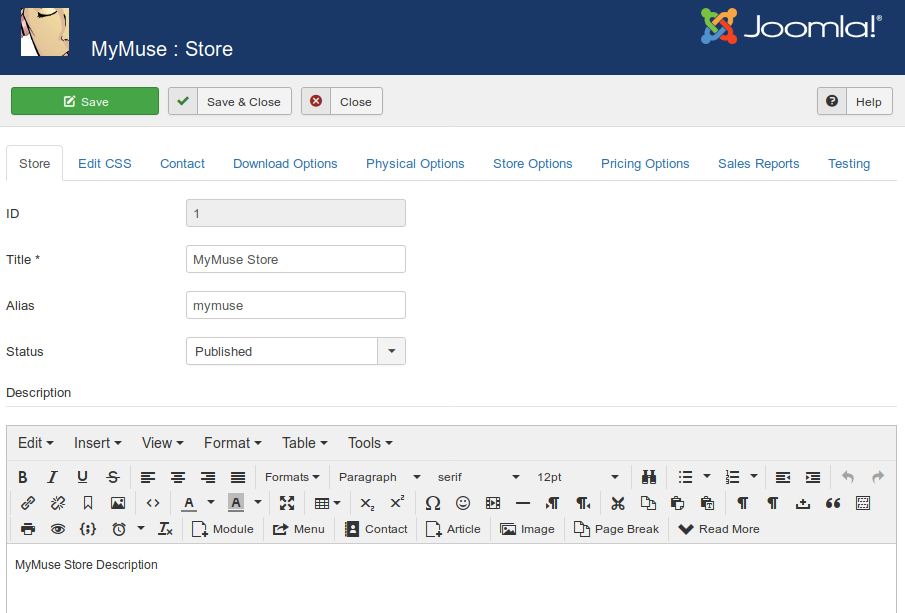
 

STORE

If you enter a description it can be pointed to with a menu of type MyMuse->MyMuse Store Layout
That view can also show any products labeled as featured, in a blog type layout.
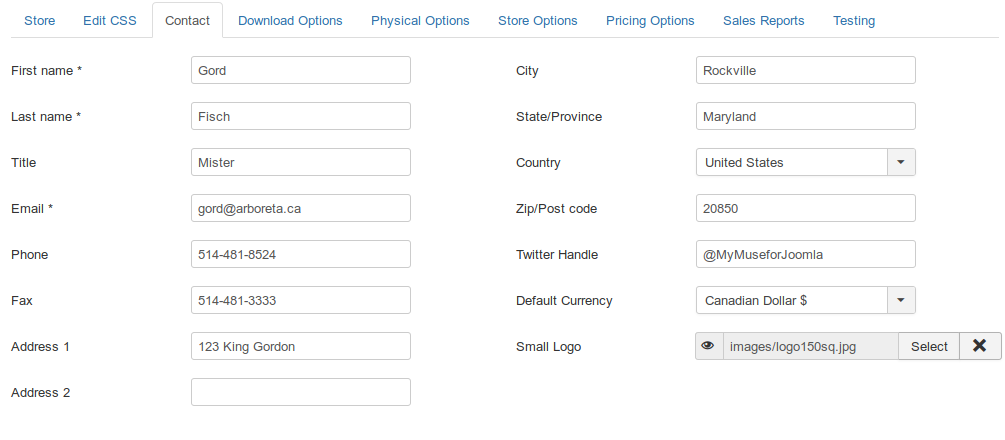
 

CONTACT

You will want to edit the Contact Info.
You will want to upload your own logo and point to it in the Small Logo field.
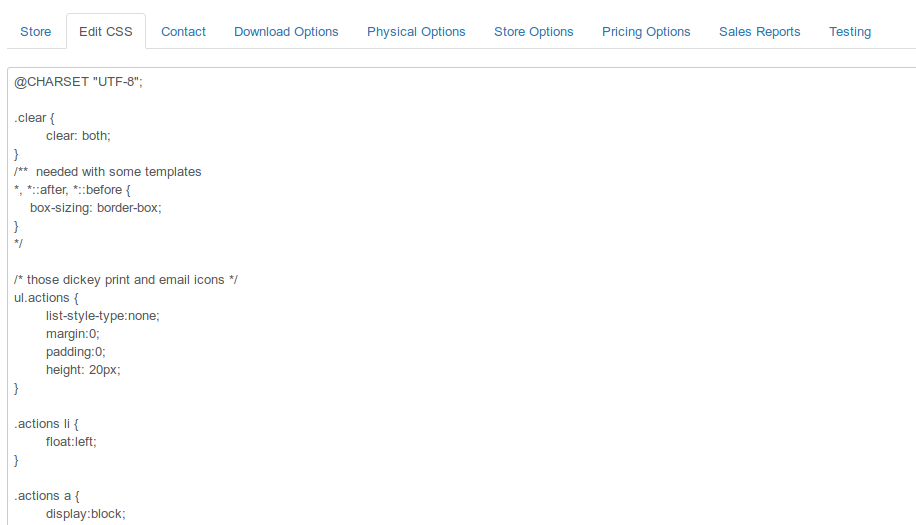
 

EDIT CSS

This is the MyMuse CSS file loaded whenever MyMuse is. Change things as you see fit. You can include whatever you like in your main CSS and not load this, (Store Options->Disable CSS)
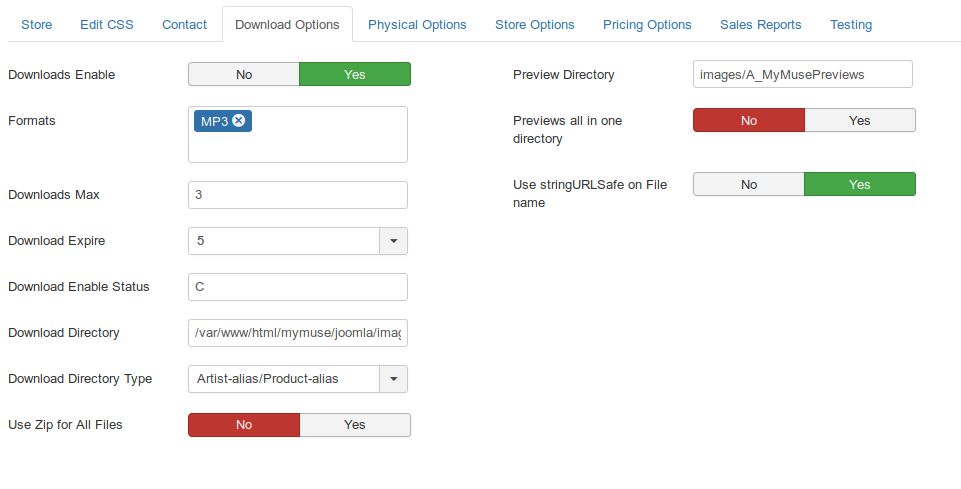
 

DOWNLOAD OPTIONS

Formats: if you just sell MP3s, leave that as the only format. You can also choose to sell multiple versions, example: MP3 and WAV.
The customer will be able to choose the format. If you want different prices for each format, go to Pricing Options->Pricing Model and choose Price by Product.
Now you can set prices in each product for each format.

Download Directory/Download Directory Type: The default is to put files in subdirectories of Downloads Directory, using the artist name and album.

/path/to/your/site/images/A_MyMuseDownloads/artist_alias/product_alias/download.mp3

OR save your files By Format. The path then would be, for example

/path/to/your/site/images/A_MyMuseDownloads/mp3/download.mp3
/path/to/your/site/images/A_MyMuseDownloads/wav/download.wav

Make sure the Downloads Directory points to the full path to your directory. MyMuse will try to determine this on install. The default will be /path/to/your/site/images/A_MyMuseDownloads. There are many ways to find your full path if you don't know it.  http://docs.joomla.org/How_to_find_your_absolute_path

If you set this to something else, make sure the directory exists and that the web server has permission to write to it.

Depending on your server set up, you may be able to put this outside your web directory for maximum security. You will have to use FTP to put files there as it will out of reach of the the Joomla Media Manager. 

Preview Directory/Previews all in one Directory: this is the relative path to the folder holding your previews. The default is to put files in subdirectories of Previews Directory, using the artist name and album.

/path/to/your/site/images/A_MyMusePrviews/artist_alias/product_alias/download.mp3

You can set this to another path but it must be within the web directory.
You can set 'Previews all in one Directory'.

Upload Files: If you set 'Previews all in one Directory' and Download Directory Type: By Format, you can upload all your files to those directories and they will be available when creating albums and tracks.
If you do not, then you should create the artist categories and products first; MyMuse will create the sub-directories, then you can upload your files.
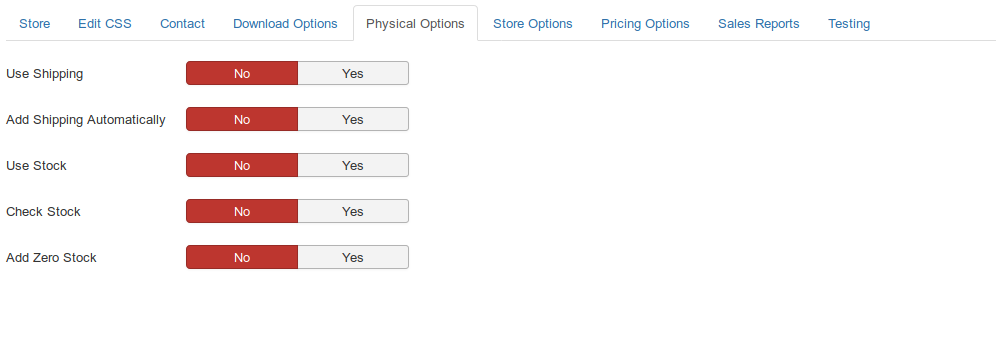
 

PHYSICAL OPTIONS

If you sell physical products, like CD'd, you probably want to turn on 'Use Shipping'. There are Shipping Plugins to handle the calculations.
'Add Shipping Automatically': if Yes and there is only one shipping option, it will be added so the customer does not have to click through another screen.
'Use Stock': Add Stock numbers to your products and deduct at sale time.
'Check Stock': If stock is at zero, stop the sale with a message.
'Add Zero Stock': Let the customer 'Backorder'. Orders with backordered items are marked in the Orders section.
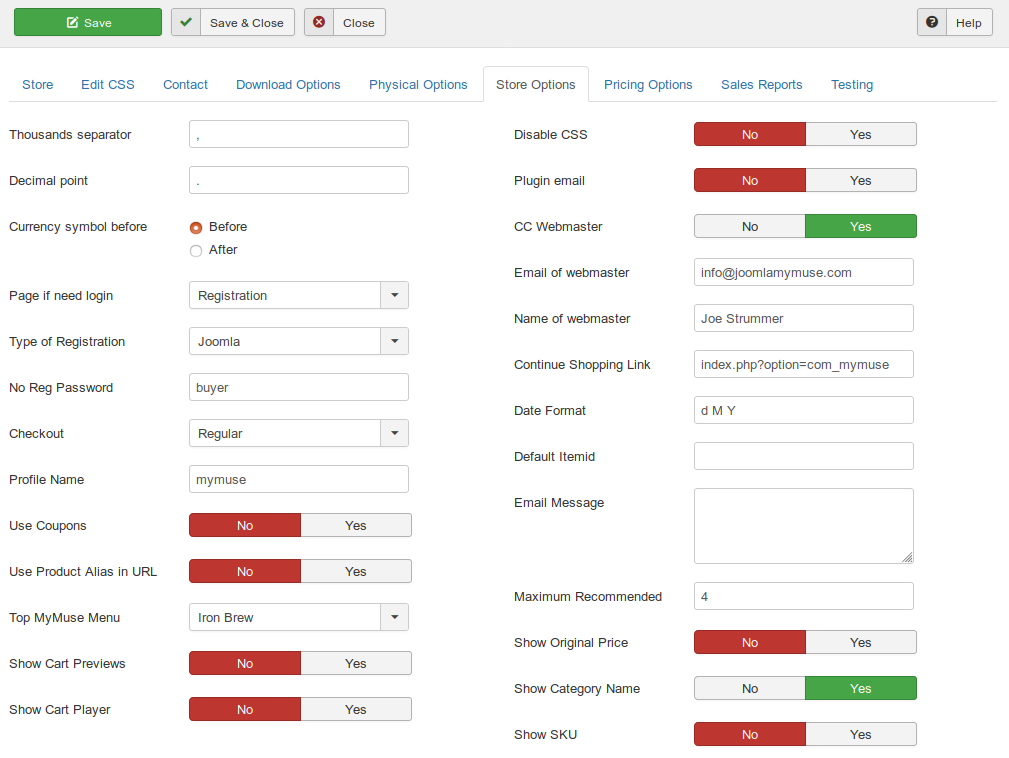
 

STORE OPTIONS

Decide what kind of registration you want: Joomla, Full, No Registration. If you are selling physical items, you will want their address. Both Full and No Registration can gather that information. There are User Plugins to handle each one.


PRICING OPTIONS

'Price by Track' lets you set a price for each track. Maybe some are longer or more valuable.
'Price by Product' lets you set the price, in each product, for the various formats you have.
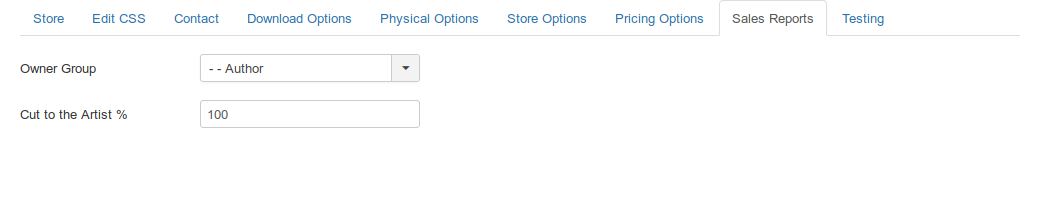
 

SALES REPORTS

'Owner Group': set which group will have access to its reports. Each artist needs a user account and must be assigned to this group.
'Cut to the Artist': What percentage should go to the artist. Is shown in reports.
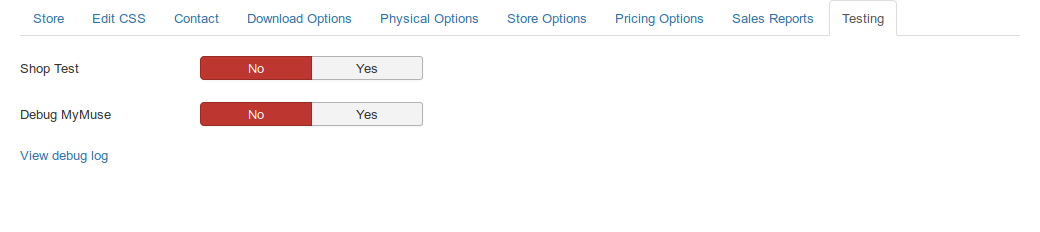
 

TESTING

'Shop Test': Any purchase goes through, emails are not sent.
'Debug MyMuse': various things, including Payment Plugin messages, are sent to the Debug Log at components/com_mymuse/log.txt


Optional: Add sample data. If you did not do this at install time, just go to the main MyMuse menu, also called 'Quick Start'. There will be a link to 'Install Sample data'.

Related Help Screen.

2) Go to Extensions->Plugins. Select Type->Mymuse.

  • - Choose the payment processors you want to be be live and enable them. You must also open them up and enter your personal data, for example your PayPal email for the PayPal plugin.
  • - If you turned on Shipping, choose the Shipping module you want

Related Help Screen.

3) Go to Extensions->Plugins. Select Type->User.

  • - Choose the user plugin you want to be be live and enable them..
  • - For Full Registration you want to enable User - MyMuse Profile.
  • - For No Registration you want to eneable User - MyMuse No Registration Profile.

Open the plugins to see what fields you want shown and required. 

If you do not want to create users, you can choose Registration Type: No Registration. Go to the Plugins->User and enable User - MyMuse No Registration" plugin. Open this plugin and choose what fields you want to capture. They will be saved in the "Notes" field of the order.

Related Help Screen.

4) Set the Options for the component.

On the main MyMuse screen there is an icon for "Options" on the top right. It is similar to the Joomla Article Options with the addition of product options. There are too many options :) but we hope the defaults are a good starting place.

Related Help Screen.

5) Make Categories to place your products under.

These can be the names of Artists or Genres or just MyMusic. I like to make a top level called MyMuse and two sub-categories called Artists and Genres. I assign artists' main category to be under Artists and additional categories under Genres.

Related Help Screen.

6) Make products!

Products can be physical (example: CD's) or just a parent (non-physical) to hold the description and the tracks or other items.
Add your tracks (downloadable) and/or other items (physical).

Related Help Screen.

7) Make menus.

  1. One or more menus that point to your Store and products. This could be a Store, Category or Product type menu
  2. A menu that points to the Shopping Cart
  3. Optional: A User Menu item that points to User Profile Edit Layout
  4. Optional: A MyMuse Item menu that points to  List My Orders
  5. Optional: A MyMuse menu that points to artists' sales report
  • Hits: 5793

Where Do Files Go?

Where files go depends on your choices in setting up the store.

DEFAULT - DOWNLOAD DIRECTORY: ARTIST-ALIAS/PRODUCT-ALIAS -- PREVIEWS ALL IN ONE DIRECTORY: NO

Create the category (artist) and product (album) and MyMuse will create the directories.

Then you can upload through the Edit Tracks page one at a time, or by FTP.  If you are using Amazon S3, go and upload all your files. Files uploaded by FTP/Amazon will show up in dropdowns in the Add/Edit Tracks screens.

Downloads
/path/to/your/site/images/A_MyMuseDownloads/artist_alias/product_alias/download.mp3

Previews
/path/to/your/site/images/A_MyMusePreviews/artist_alias/product_alias/preview.mp3


DOWNLOAD DIRECTORY: BY FORMAT -- PREVIEWS ALL IN ONE DIRECTORY: YES

Create subdirectories for formats and upload your files.

Downloads
/path/to/your/site/images/A_MyMuseDownloads/mp3/download.mp3
/path/to/your/site/images/A_MyMuseDownloads/wav/download.wav

Previews
/path/to/your/site/images/A_MyMusePreviews/preview.mp3

Once you upload all your files the file names will appear in a drop down in the tracks add/edit page.

For security, if using apache web server, and your download files are within the web directory, confirm there is a file .htaccess at the top of the download directory

download_dir/.htaccess

The default is:
images/A_MyMuseDownloads/.htaccess


This should stop direct downloads of files.
If it is not there, you can copy it from administrator/components/com_mymuse/assets/htaccess.txt ->
images/A_MyMuseDownloads/.htaccess


Graphics: MyMuse creates a directory called images/A_MyMuseImages but you can put category/product images wherever you like.

  • Hits: 4682

Update/Upgrade

UPGRADE FROM 3.X TO 4.X

It is recommended to make a copy of your site, for example at staging.yoursite.com to test upgrading from 3.x to 4.x.

At the very least you should have a backup that you can revert to in case of problems. We recommend Akeeba Backup.

UPDATE TO THE LATEST VERSION

MyMuse uses Live Update from Akeebabackup. To get the new version, you must go to Components->MyMuse and click on Options at the top right. Enter your Download ID. from this site into the tab "Live Updates".

You can find your download ID on the invoice for your subscritiuon, or log in to this site and go to Subscribe->My Subscriptions. Find your current subscription and clcik "View Details".


Go to Components->MyMuse and you will see a notice when there is a new version. Click on UPDATE FOUND! CLICK TO UPDATE and click to install the update.

If you see the error "Unable to open archive
Extracting the update package failed. Please try updating the extension manually". Please click on "Refresh Update Information" and try again.

The software will be updated.

You can also come here and download the latest version. Install the latest version. It will detect that MyMuse is already installed and not touch the database, simply overwriting old files with the new ones.

IMPORTANT: open Components->MyMuse->Store and save once to establish new options.

MyMuse will save the css file as components/com_mymuse/assets/css/mymuse_old.css
If you have made changes there please compare the old and new to bring in your changes.


  • Hits: 5780

Store Configuration

Go to Extensions->MyMuse->Store

Here you can configure your store. You want to at least set your own Contact information.
If you use the Store view in a menu it will display the description and any products set as featured.

Description

The Store [edit] page holds information for your store.

 MyMuse New Store   Store   Administration

Store
  • Title (required): the name of your store.
  • Alias (optional): Joomla! will create an alias that can be used in SEF URL's
  • Top Level Category: the category to associate with the store.
  • Status: published or not.
Description
  • This is the default description of your store. You can point to it from a menu item by choosing
    MyMuse->Store->Store Layout


EDIT CSS: Edit  CSS that applies to MyMuse

MyMuse New Store   CSS   Administration


CONTACT: will be used with all emails.


MyMuse New Store   Contact   Administration
 
  • First Name
  • Last Name
  • Title (optional)
  • Email
  • Phone
  • Fax
  • Address 1
  • Address 2
  • City
  • State/Province/Region
  • Country: choose your country and if we know the states/provinces we will show them
  • Zip/Postal Code
  • Currency: will be sent to your payment processor as your currency
  • Small Logo: will be used on html emails


DOWNLOAD OPTIONS
MyMuse New Store   Download   Administration
 
  • Downloads Enable: Turn downloads on or off.

  • Formats to Sell: If you want to sell multiple formats, you must supply them for each product. For example "MP3" and "WAV"
  • Download Max: Maximum number of times the customer can make the download.

  • Download Expire: How long until the download expires in seconds (43200 is 3 days).

  • Download Enable Status: The order status that is required before downloads are
    enabled 'C; is confirmed.

  • Download Directory: The FULL PATH to the download files. Depending on your hosting, you may be
    able to put this out of the web directory. /path/to/your/site/images/A_MyMuseDownloads.

    If you are using S3 integration, the Amazon S3 bucket where your download files will be / are stored. The bucket must exist (MyMuse can't create it for you). The user identifed by the Access and Secret Key provided above must have at least read access to the bucket for downloads to work. IMPORTANT! Bucket names are case sensitive. Abc, abc and ABC are three <em>different</em> buckets as far as Amazon S3 is concerned!

  • Download Directory Type: The default is "Artist-alias/Product-alias" ex: pink-floyd/dark-side-of-the-moon. The other option is "By format (ex. mp3 or wav)". with this option you would store your mp3's in the folder  download-directory/mp3 and your wav's in download-directory/wav. For example:
    /path/to/your/site/images/A_MyMuseDownloads/mp3/
    /path/to/your/site/images/A_MyMuseDownloads/wav/

  • Use Zip for All Files: When creating an "All Files" type of track (selling all the files for one album/product), make a zip file on the fly. This saves the customer downloading each file separately.

    You must have the zip enabled in your PHP and have the memory available per process for all the files combined. memory_limit should be greater than all the files plus the regular php process. This can be quite big is selling wav files :)

  • Preview Directory: The relative path to the preview directory.
    Default is 'images/A_MyMusePreviews'.

    If you are using S3 integration, the Amazon S3 bucket where your files will be / are stored. The bucket must exist (MyMuse can't create it for you). The user identifed by the Access and Secret Key provided above must have at least read access to the bucket for downloads to work. IMPORTANT! Bucket names are case sensitive. Abc, abc and ABC are three <em>different</em> buckets as far as Amazon S3 is concerned!

  • Previews all in one directory: this does away with the "Artist-alias/Product-alias" and you can place all your previews in the Preview Directory.

  • Encode Filenames: DEPRECATED. Rename file to an md5 hash (32 bit string of characters and numbers). This option will no longer be available. We found it  made tracking your files difficult.Saving the store will convert your filenames to their original names.

  • Use StringURLSafe on file names: If set to yes, then files names will be converted to StringURLSafe format (all lowercase, spaces and non aplpha-numeric chars become hyphens).

PHYSICAL OPTIONS
MyMuse New Store   Physical   Administration

,,,


  • Use Shipping: turn shipping plugins on or off.

  • Add Shipping Automatically: If there is only one shipping option, add it automatically and send a message to the customer.

  • Use Stock: Add stock numbers to physical items. They will be deducted by each sale quantity.

  • Check Stock: Stop the order if the stock would be less than zero.

  • Add Zero Stock: Add the zero stock items to the order anyway.


STORE OPTIONS
MyMuse New Store   Store Options   Administration
 
  • Thousands Separator: For your currency.

  • Decimal Point: Some countries use commas.

  • Currency Symbol Before: Currency symbol before or after price.

  • Page if need login: When it is time to login, send them to Joomla's Registration page or Login page.

  • Type of Registration:
    • Joomla: just use Joomla's registration. Capture their name, username, email and password.
    • Full: includes Joomla registration PLUS any required or optional items from your Profile plug-in.
      The default plugin is Plug-ins->User->User - MyMuse Profile. If you activate a different plugin, enter its file name (without the .php extension).
    • Jom Social: checks if the user is logged in, if not, send them to Jom Social login page.
    • No Registration: uses a guest account to log in clients. You can still capture fields that you have set as required or optional in the
      Plug-in User->User - MyMuse No Registration Profile. These are saved in the Notes field of the order.

      Do not enable multiple profile plug-ins.

  • Checkout: Regular or Skip Confirm Page. Most payment processors recommend or insist on a Confirm Page with all the details of the order.

  • Profile Name: name of your profile plugin (just use 'mymuse' unless you know what you are doing and write your own plugin).

  • Use Product alias in URL: SEF URL's will use only the top menu alias/product alias in the router.

  • Use Coupons: Allow customers to enter coupons you create in back end.

  • Top MyMuse Menu: This will be first in URLs before your product/category alias or cart function.

  • Show Cart Previews: Show Previews for tracks in cart

  • Show Cart Player: Show the Player in the Cart

  • Disable CSS: Do not load the MyMuse CSS file. You have copied it into your main template.css or somewhere else.

  • Plugin email: Be notified by the Payment Plugin for every transaction.
  • CC Webmaster: copy webmaster on every email.

  • Email of webmaster

  • Name of webmaster

  • Continue shopping link: When they are looking at the cart they can choose "Checkout" or "Continue
    Shopping". This sets the link for "Continue Shopping".

  • Date Format: Change the way dates are displayed.

  • Email Message: Include an email message with emails that go out.

  • Show Original Price: Will show original price with Strike-through and the discounted price.

  • Show Category Name: Show Category Name in Cart and on Orders.
  • Show SKU: Show the SKU in Cart and on Orders.

PRICING OPTIONS: Select the way you set prices.
MyMuse New Store   Pricing Options   Administration
  • Pricing Model: Default is "Price by Track". Each individual track can have its own pricing.
    Option: "Price by Product". For each product set the price of files by each format and for All Files by format.


.

SALES REPORTS FOR ARTISTS: You can assign users to a group and a category, and create a menu for them to access sales reports.
MyMuse New Store   Sales Reports   Administration


  • Owner Group: You can create a new group for your artists or leave this as Public
  • Cut to the Artist: Percentage of sales that will be given to the artist.


TESTING
MyMuse New Store   Testing   Administration

 
  • Shop Test: You do not have to pay for items. The cart session is not destroyed when making an order.
  • Debug MyMuse: Save Payment Gateway messages to /components/com_mymuse/log.txt.
  • View debug log: open a screen to view debug messages.

Toolbar

At the top left you will see the toolbar:

store-edit-toolbar

The functions are:

  • Save. Save the store and return to the list screen.

  • Save & Close. Save the store and return to the list page.

  • Close. Do not save, just return to the list screen.

  • Help. That's me :).


  • Hits: 4516